CONNECTING THE RPI WITH THE AUTOPILOT
In this activity what we will do is connect the Raspberry Pi with the Autopilot.
First, look on the SD card of our RPi where the config.txt and cmdline.txt files are.
For that we do: cd / boot list and all the programs will appear, we make a copy: sudo cp -pr /boot/firmware/cmdline.txt /boot/firmware/cmdline.txt
Install on the laptop PUTTY/ or use the mission planner
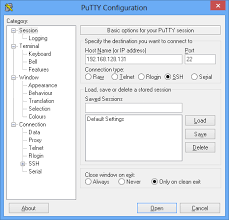
Instalamos en nuestro laptop la aplicación PUTTY https://es.wikipedia.org/wiki/PuTTY


With this application we can communicate with the Rpi, either with the cable supplied for such use (USB from the laptop to the Flightcontroller of the drone), or through an IP address created for such use, HOTSPOT.

In this case we will use a HOTSPOT that we have previously created to be able to broadcast a video signal with an Intel RealSense D435 camera to the Mission Planner installed on our laptop.

The main problem is that the camera is Intel and our Raspberry is an ARM board, they are not compatible and therefore we will have to download an extra package, in this case from rpanion (Rpanion Electronics is an Australian company offering hardware and software solutions for autonomous vehicles, including custom development.We specialize in Companion Computer (see What is a Companion Computer) integration with MAVLink-based flight controllers – such as Ardupilot and PX4.) that will help us connect, creating a WiFi signal from our Raspberry.

I leave a link that talks about the version I use, in this case 0.8

discuss.ardupilot.org/t/rpanion-server-0-8released/79828

We download this version and put it in the SD of our raspberry.

Note: Username is; rpanion and password is: rpanion123

We turn on the Raspberry and connect to the rpanion network through our laptop. Once we are connected, we open a page and paste the following address: 10.0.2.100:3000. This IP address can be found on the rpanion website, we go to Video Streaming, we choose as device Intel Real Sense Depth Camera, the first of the two, this camera is the color camera, if we choose the second it would be the camera in black and white. We change the resolution and the bits to increase the resolution of the camera, otherwise the image is transmitted with a lot of latency. We click on Start Streaming and some new tabs will appear, we choose the last one, Mission Planner Connection Strings.

We copy the second address rtsp://10.0.2.100:8554…..etc. and we paste it in the Mission planner.

We open Mission Planner and connect the drone, we go with the mouse to PFD and click the right button, a tab appears with several options, we choose video, we go to SetGSstreamer Source and we paste all the address indicated above. The video will start streaming, even with the drone unplugged.
Battery check
Rpi Battery check