The aim of this section is to learn the basics of how to configure and calibrate an autopilot for your drone. In our case, we used the Pixhawk Orange Cube.
For the different steps of this process we followed the video on the following link: PixHawk/Mission Planner/ArduCopter Build for Beginners: Flashing the flight controller – YouTube
Additionally, the same Youtube channel has a playlist with more videos covering different aspects of the autopilot, in case you want to know more about that, you can find them in the next link: (1/5) PixHawk Video Series – Simple initial setup, config and calibration – YouTube.
After this small introduction, it’s time to start with the setup. The next paragraphs will try to put together the steps explained on the video with our own experience.
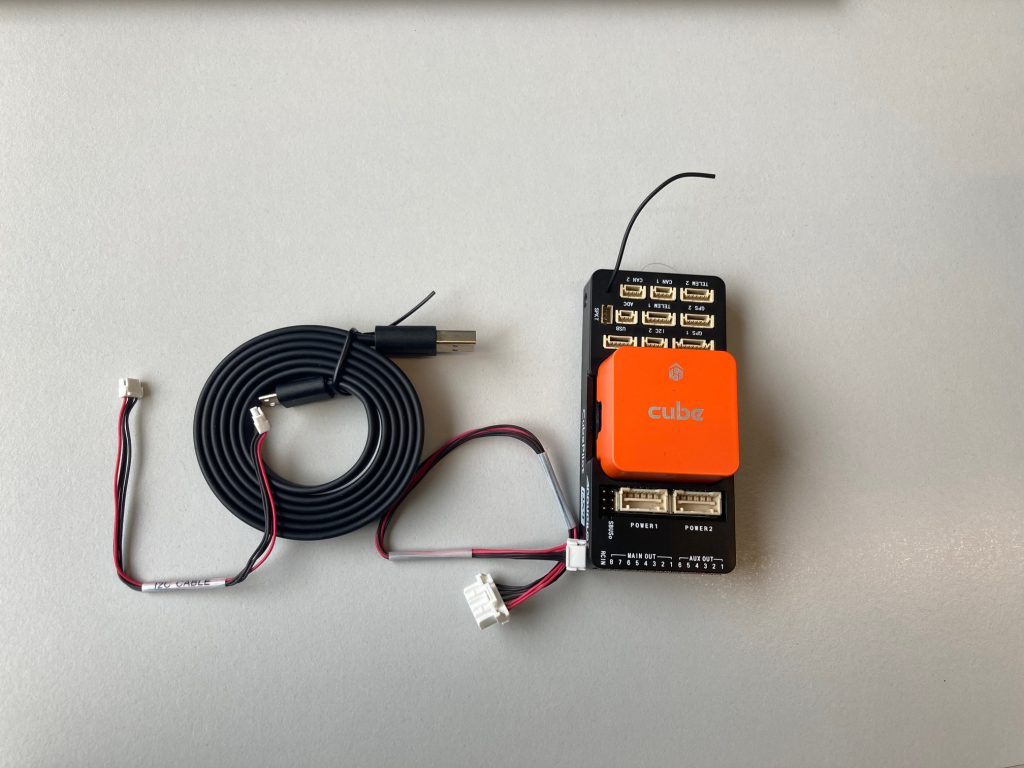
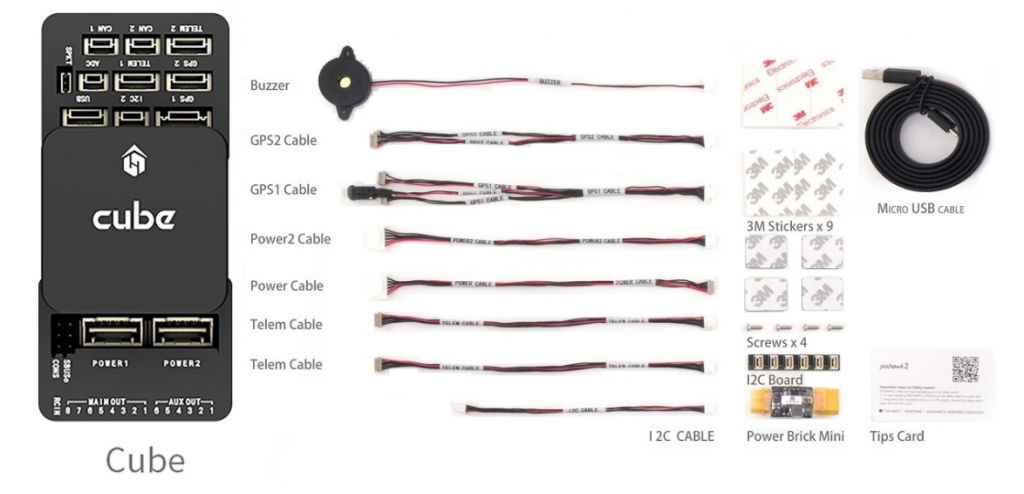
First, this picture is useful to have a overall view of what components come in the Pixhawk Cube Orange package
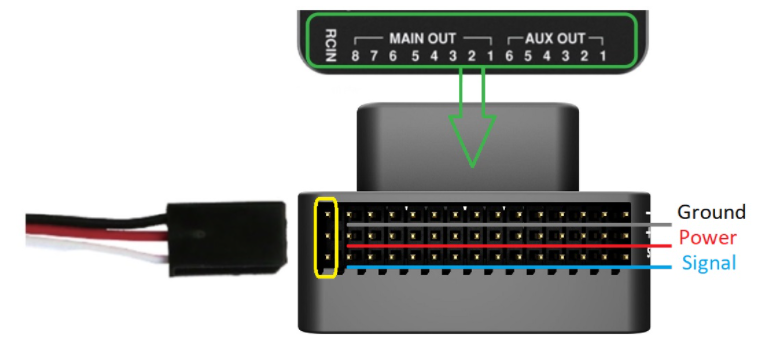
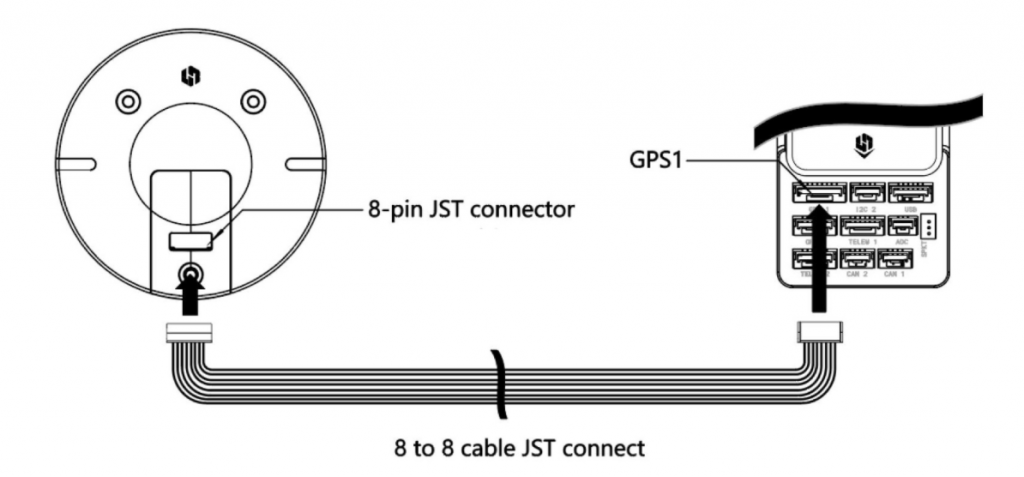
First, you should connect to the autopilot the radio receiver (we covered this component in a previous post), the GPS and the buzzer. You can see how these are wired in the following images, taken from the Pixhawk User Guide (Cube Wiring Quick Start | PX4 User Guide).

Next step is to download the software we will use for our autopilot: Mission Planner. You can download the latest version on their website (ArduPilot firmware : /Tools/MissionPlanner).
Once you have completed this step, you should install the required firmware in the Cube. First, connect your computer with the Cube via the USB cable. Then, open Mission Planner and follow the steps on the video introduced earlier, which will guide you through the different windows of the software (start from minute 8:15).
As soon as this first parameters are configured and loaded into the hardware, you should be able to see your current location on the screen. Additionally, when moving the Cube upwards or downwards, you will see the movements reflected on the screen.
The video also explains some configuration parameters that should be modified to make sure everything works fine (minute 10:50).
- GPS CAN bus settings.
- External LEDs.
- Disable the external safety switch (when using GPS via CAN bus).
You should follow the steps carefully, specially the reboot operations are key to setting everything up correctly.
Once the configuration is finished, the only thing left is to calibrate the different sensors the autopilot will need. The process is covered in a different post of the blog: Drone calibration – Getting our drone ready for the 1st flight (upc.edu).
1 Comment
Pau · 17 de October de 2021 at 11:59
Sick