
In this activity we will learn how to receive information from the real autopilot through the Telem 2 serial port. To do this, we will follow these steps in order to make the connection correctly:
- Connect your computer with the autopilot via USB (as usual) and also to Telem2 using the cable in figure 2.
- Identify in your computer the port where Telem2 has been connected Figure 3.1
- In Mission Planner set SERIAL2_BAUD to 115. This will be the speed for the connection.
- Reboot the autopilot: DATA -> Actions -> Preflight_Reboot
- Prepare a simple program in Python like the one shown in the figure.
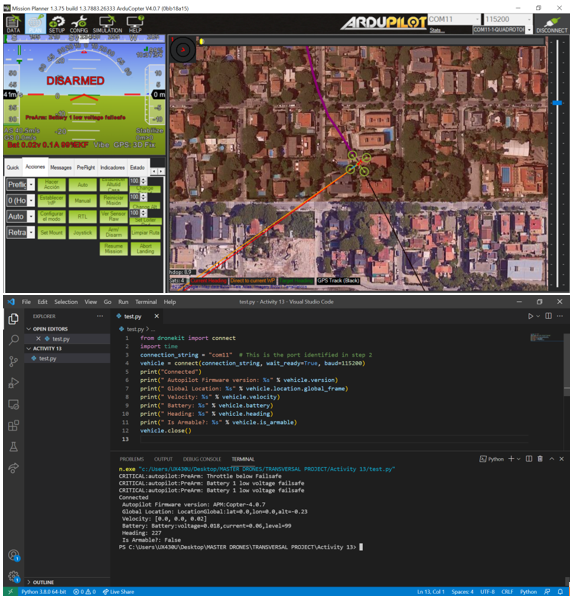
As it can be seen, in the command window of our script, we were getting telemetry trhough the port COM11, that is the Telem 2 port.
But why we need this method to obtain the telemetry if we had another two ports to connect the Autopilot with our computer?
Well, to verify if through the USB port the telemetry can be sent, we just changed the port number and run again the program, and this was the results:
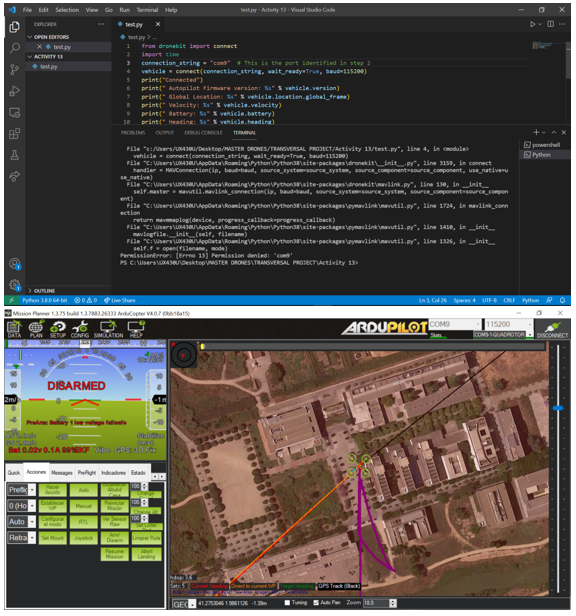
As it can be seen in the command window, we are not getting the telemetry trhough this port, the USB port. The reason is not clear but it seems that there is a limitation in the Mavlink protocol in this port that limitates the telemetry.
However, we have verified that through the Telem ports 1 and 2 if the telemetry of the real autopilot can be obtained