This activity explains the different exercises that have been developed in order to learn how to use Python codes plus the Dronekit library in order to interact dynamically with the Mission Planner simulator. This activity will help us so that in the future, when we install our Raspberry Pi on our Drone, we can load these codes into the computer on board and interact with the controller.
To carry out the first examples that we will explain below, it is necessary to install Python and in our case, we used Visual Studio Code as an editor in order to develop our codes.
The following links can be downloaded:
It is important to know that in order to use the Dronekit library, you must first install Python. Therefore, the following command must be executed in the Visual Studio Code terminal:
- pip install dronekit
Once everything is ready, we can make the first proposed example.
EXAMPLE 1
This example is the simplest but very important in order to be able to understand how the dronekit library is used and to know how to connect to Mission Planner.
In this example, what we will do first is run the simulator from the Mission Planner, as was done in activity #11. Once connected, on a specific port, we can create a mission and send it to the main menu as we did, and start it.
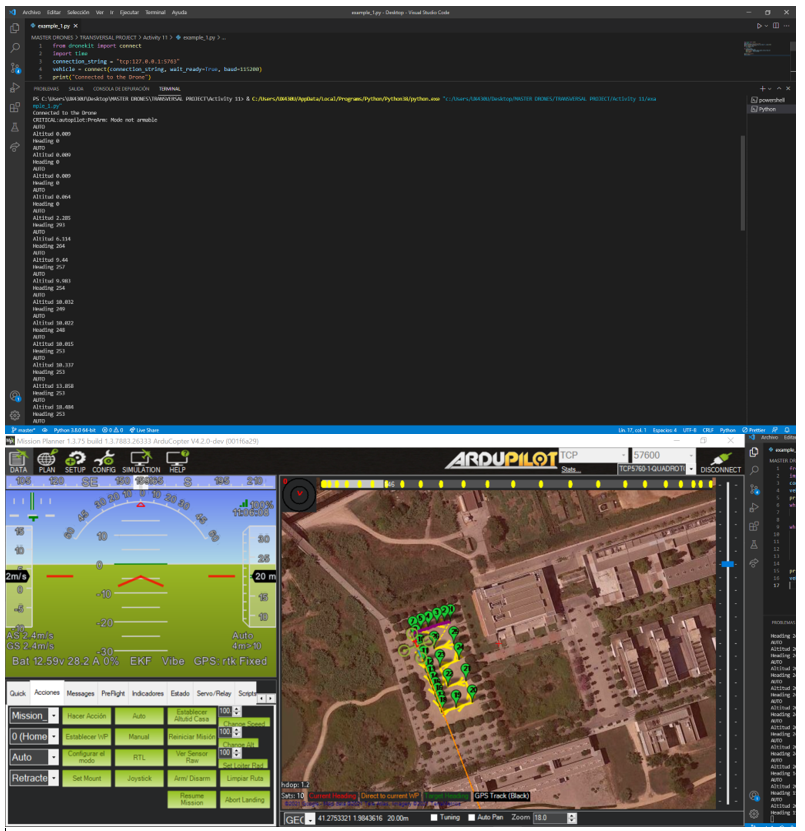
The next step is to run the Python code. What this code does is connect the simulator through a different port to the Mission Planner in order to receive information and also give instructions.
Then, looking at the code, once it has connected to the simulator on another port, the program will wait until the vehicle is armed. Once it is armed, action that in this example must be done from Mission Planner, we will be able to see by the terminal of Visual Studio Code data of HEADING and ALTITUDE of our simulator every 2 seconds.
Below you can see the code and images of the Python program by compiling and obtaining data from the simulated Dron while running a mission in the Mission Planner:

EXAMPLE 2
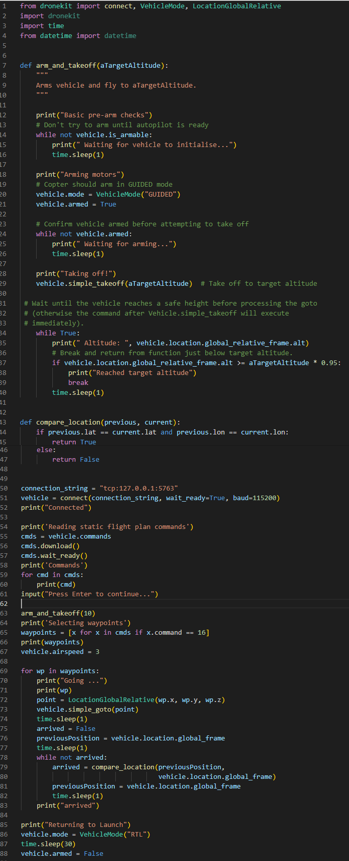
The second proposed example changes a bit from what was previously seen. In that one the program in Python only reviewed information of the simulator and it showed it by screen. In this example, it is the program that instructs the simulator to perform the action of arming, take off to a certain height and start a mission, which must previously be loaded from the mission planner as s has done in activity #11. In the code you can first see that the connection is made, the flight plan loaded from Mission Planner is read and the arm_and_takeoff function is executed. Then, inside a loop, a simple_drop is executed to make the simulated Drone go to the Waypoint corresponding to the flight plan and the positions are compared every second with another function defined at the beginning of the code in order to know when you have reached the corresponding WayPoint and make another go to the next WayPoint. Once the mission is over, the RTL instruction is sent and the connection ends.
Below you can see the code and how the program runs at the same time with the Mission Planner.
With these two examples we have seen how information can be received while running a mission previously loaded in the Mission Planner and how to instruct the Mission Planner simulator to arm, take off, follow the flight plan, previously uploaded from Mission Planner, and finally perform an RTL.
EXEMPLE 3
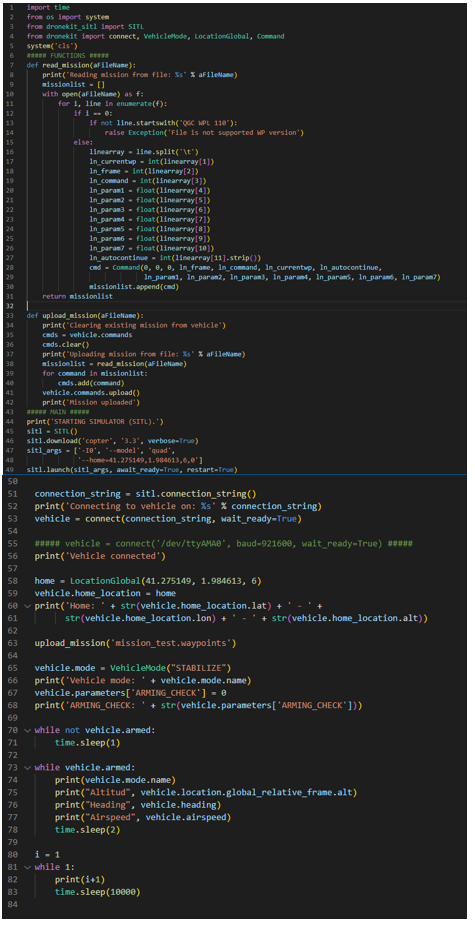
In the following example, you will see how to read a previously created mission that is loaded using the python code itself into the Mission Planner, not like the other two examples where the flight plan is loaded directly from the Mission planner with the WRITE WPs button .
On the other hand this code makes the SITL connection from the code itself. In the other examples the connection with the simulator was made from the SIMULATION menu, and there the connection of the Mission Planner with the simulator was established. In this case, the SITL runs from the code itself and the connection is established from Python, the only thing to do is press the button connection and connect to the correct port 5762.
It is important to install the library for the SITL with the following command:
- pip install dronekit_sitl
In conclusion, this code that was created does the following:
- Run SITL from Python, not from Mission Planner.
- Read a flight plan previously created in the folder where the code is.
- Upload it to the Mission Planner directly.
- Once we arm and start the mission from Mission Planner, the parameters of HEADING, ALTITUDE and AIRSPEED are seen by the console.
Now, you can check the code developed and the exemple running in the folowing photos:
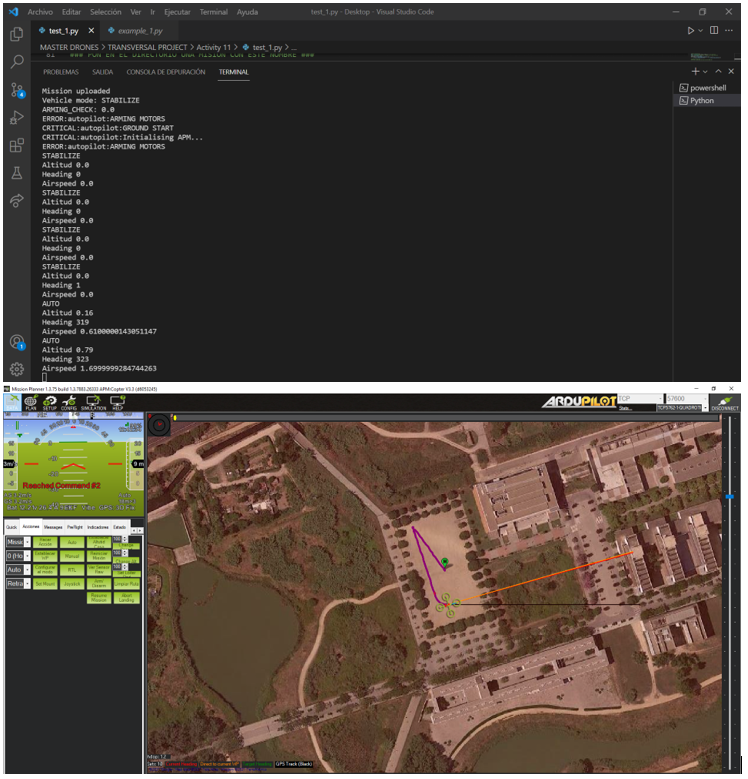
Now, with these examples we have seen we are already able to connect to the simulator from Mission Planner, from Python, receive information from the Drone, give orders to the Drone from the Mission Planner and the Python code itself, read flight plans and upload them to the Drone from Pythone and run the missions.
Below we will see some other examples that can be done with Python in order to see more features.
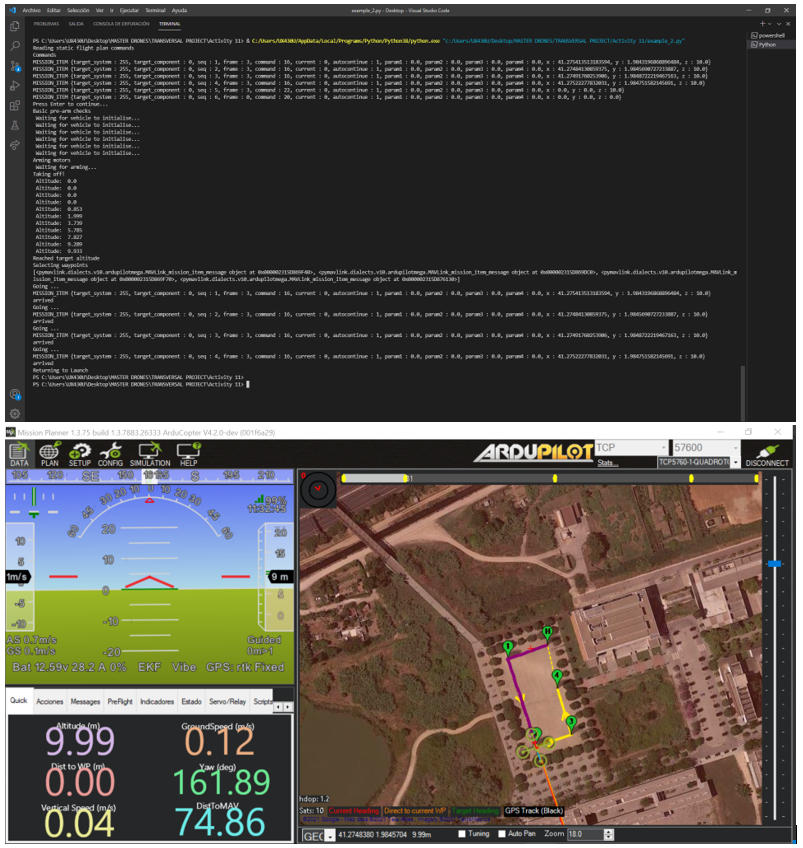
EXEMPLE 4
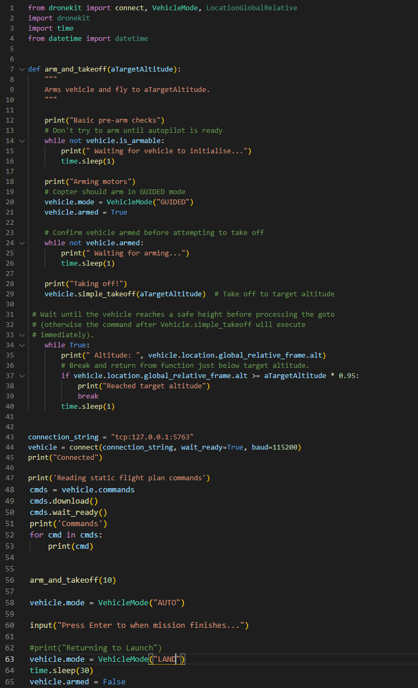
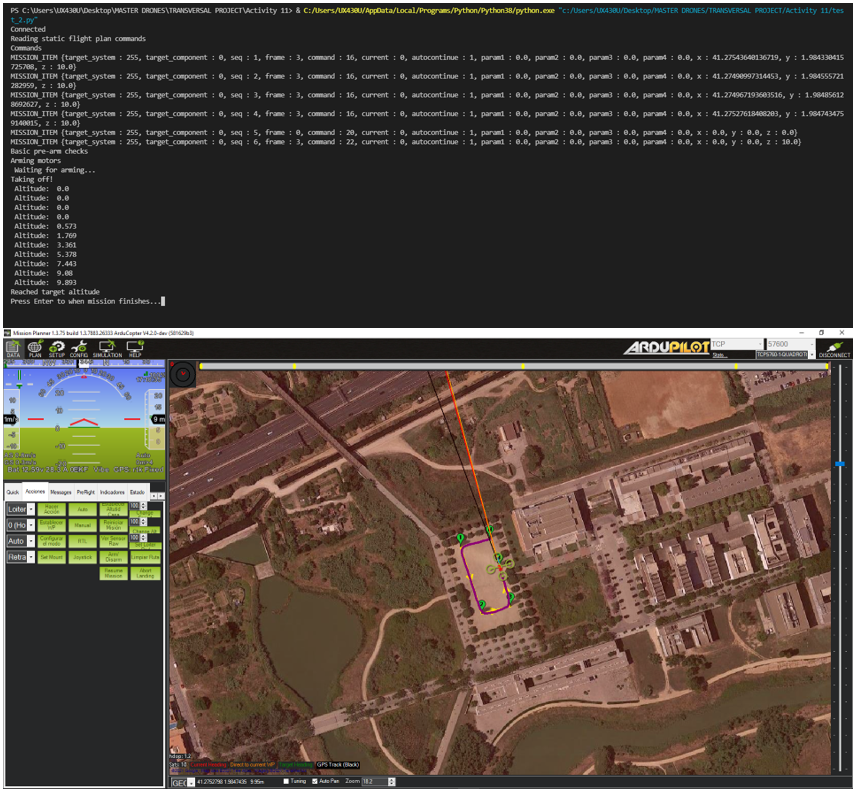
Finally in the following example we will use a bit of each of the above examples. The aim of these is to connect via the Mission Planner SITL as done in examples 1 and 2 and also via Python through another port, in order to be able to give commands both from Mission Planner and from the code. .
On the other hand, the ARM_AND_TAKEOFF function has been incorporated in order to give an instruction from the take-off code. Once the desired altitude has been set, the flight mode is changed to AUTO, in order to execute the previously loaded mission, this time from Mission Planner.
Once we see that the mission is over, the program asks the terminal to press the ENTER key to switch mode to LAND in order to end the flight.
This example is the one we will use the most in the future as the AUTO mode is the one we will use the most in order to carry out the missions created most efficiently.
So right now we know perfectly well how to connect to the controller, simulate, and run missions automatically.
Now, you can check the code developed and the exemple running in the folowing photos: